

A reflective golf club transforms an ordinary tee-off scene when the composition is viewed from a lower, closer angle.
Reflecting on Perspective: Finding the Unexpected Through the Lens
An ordinary subject can become a much stronger photograph when you change where you stand, how close you get or what you notice inside the frame.
My approach: when a scene feels ordinary, I change something before walking away—my height, my distance, my angle or the reflective surface I am using.
How Can Changing Perspective Improve a Photograph?
Changing perspective improves a photograph by showing the subject from a height, distance or angle the viewer does not normally see.
Get lower. Move closer. Step to one side. Look through something. Pay attention to reflections.
These small changes can turn a familiar subject into a photograph that feels much more intentional.
The photograph featured in this guide started with a very ordinary scene: a golf ball and club poised at tee-off.
The photograph changed when I noticed the club’s reflective surface. Getting lower and closer allowed the reflection to become part of the story instead of treating the club simply as an object in front of the camera.
Perspective Photography at a Glance
Look Past the Obvious Subject
At first glance, the golf photograph is simply a ball and club ready for tee-off.
But a closer look reveals another layer.
The polished surface of the golf club contains a reflection that adds depth, visual interest and a sense that there is more happening beyond the obvious subject.
That is what interested me about the frame.
The golf club was not only part of the scene—it became another way of seeing the scene.
The composition worked because I changed my perspective instead of making the straightforward photograph from normal eye level.
Take the Obvious Photograph—Then Keep Looking
There is nothing wrong with making the straightforward photograph first.
Capture the scene you initially noticed.
Then pause before moving on.
Ask yourself what changes if you move closer, lower the camera, step to the other side or isolate one smaller detail.
The first photograph documents what was there.
The next photograph may show how you personally saw it.
Simple exercise: Before leaving a subject, make at least three noticeably different compositions instead of taking the same photograph three times.
Stop Photographing Everything From Eye Level
Eye level is convenient, but it is also the angle from which most people already experience the scene.
Get Low
Crouch, kneel or carefully bring the camera closer to the ground. A lower angle can make a small subject feel larger, reveal foreground details or change what appears in the background.
Go Higher
When a safe elevated position is available, look downward. A higher viewpoint can reveal patterns, simplify a cluttered scene or show relationships between objects that are difficult to see from eye level.
Match the Subject
Photographing from the subject’s approximate height can create a completely different sense of connection than standing above it.
Watch the Background
Even a small change in camera height can move a distracting sign, bright sky or other object out of the background.
Move Closer and Let the Detail Become the Story
A photograph does not always need to explain the entire scene.
Move closer when a texture, reflection, shape or small detail is more interesting than the overall setting.
The golf club photograph works because the viewer is encouraged to notice the reflective surface rather than seeing only a golfer standing on a tee box.
A close composition can turn ordinary things—chrome, glass, painted surfaces, water droplets or architectural details—into the subject.
Then step back and make another version.
The wider photograph provides context. The close photograph asks the viewer to pay attention.
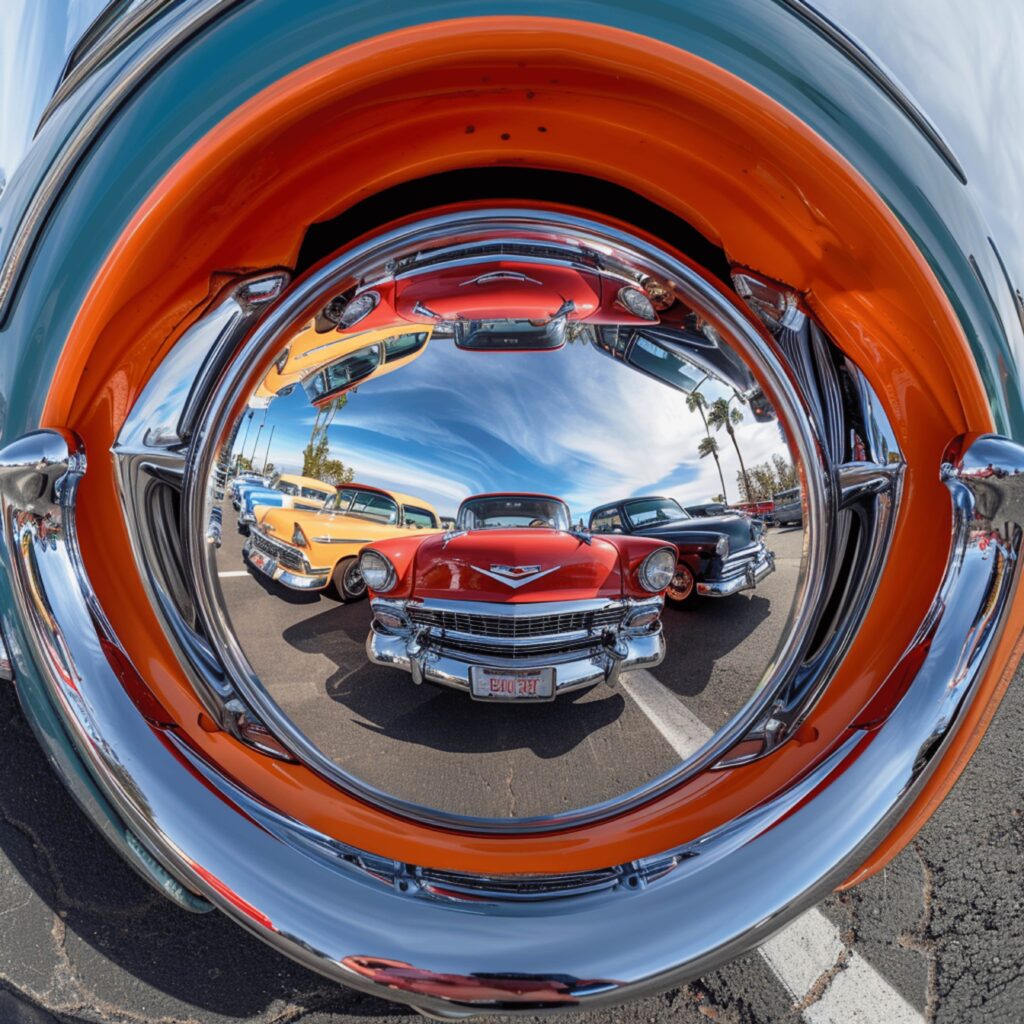
Use Reflective Surfaces as Another Layer
A reflection can show something the main frame does not reveal directly.
Polished metal, chrome, glass, mirrors, windows, still water and even small puddles can all become useful reflective surfaces.
Do not look only for perfect mirror reflections.
A reflection may be partial, stretched, curved or distorted by the shape of the surface.
That imperfection can make the photograph more interesting because the reflected scene does not look exactly like the original.
The goal is not simply to double the subject. It is to use the reflection to add information, depth, contrast or another point of view.
Four Ways to Make Reflections More Interesting
Move Until the Reflection Changes
A small step left or right can completely change what appears inside a reflective surface. Do not assume the first angle is the strongest one.
Let the Reflection Be the Subject
Frame tightly when the reflected scene is more interesting than the object creating it.
Include Both Reality and Reflection
When possible, show enough of the actual object or environment that the viewer can understand where the reflection comes from.
Keep the Distortion
Curved metal, rippling water and uneven glass can bend the reflected scene. That distortion can become part of the photograph rather than something you need to correct.
Change Your Angle Before Changing Your Gear
One of the easiest ways to improve a composition is to move your feet.
Step left.
Step right.
Move closer.
Walk around the subject when the location safely allows it.
Each position changes the relationship between the subject, background, light and any reflective surfaces.
This matters more than simply zooming in or out from the same spot.
Before reaching for a different lens: ask whether a better photograph is available simply by changing where you are standing.
Focus on Details Other People May Walk Past
Creative photography often begins with noticing something small enough that most people do not stop for it.
Look at surfaces, textures, shadows, edges, reflections and patterns.
Notice what happens when light hits metal, glass or water.
Look at what appears inside a reflection instead of concentrating only on the object producing it.
Travel photography does not always require a famous landmark or dramatic landscape.
A small detail can say something memorable about a place when you photograph it intentionally.
Pay Attention to What Is Behind the Subject
Changing perspective affects the background just as much as it affects the subject.
When you lower the camera, move sideways or photograph through a reflection, new objects may enter the frame while others disappear.
Before pressing the shutter, check the edges.
Look for poles, signs, bright patches, people or other elements that compete with the subject.
A tiny movement can often simplify the background without changing the main idea of the photograph.
How to Experiment With Perspective Using Your Phone
A smartphone is ideal for perspective experiments because it is small enough to place close to the ground, near reflective surfaces or into angles that may be awkward with a larger camera.
Clean the lens before you start, especially when photographing reflections or bright surfaces.
Tap the area you want sharp rather than allowing the phone to choose the focus point automatically.
Move the phone physically instead of relying heavily on digital zoom.
Try both horizontal and vertical compositions.
For very low angles, you may not even need to place your face behind the phone. Lower it carefully, tilt the screen when your model allows and make several frames while slightly adjusting the angle.
The goal is experimentation, not technical perfection.
The Three-Angle Photography Challenge
The original version of this article included a simple challenge that is worth keeping: find one reflective object and photograph it from three genuinely different angles.
The Obvious View
Photograph the object from the position that first caught your attention.
Get Lower or Closer
Change your height or distance enough that the reflection, background or shape of the object changes noticeably.
Move Around the Subject
Step to another side and look for a different reflection or relationship between the object and its surroundings.
Do not make three nearly identical photographs. The purpose is to prove to yourself how dramatically the story can change when the camera moves.
Not Every Reflection Needs to Be Perfect
A partial, curved or distorted reflection can be more interesting than a perfectly symmetrical one.
Reflective surfaces rarely behave like flawless mirrors.
Chrome bends. Water ripples. Glass adds glare. Polished metal changes the shape of whatever it reflects.
Those imperfections can give the photograph character and help the viewer understand what kind of surface they are seeing.
Rather than trying to correct everything, decide whether the distortion is part of what made you stop and take the photograph in the first place.
Build Stronger Travel Photography Skills
Changing viewpoint is one creative-composition technique.
For broader guidance on light, framing, equipment, storytelling and photographing different situations while traveling, visit my complete Travel Photography Tips guide.
Common Perspective Photography Mistakes
Creative composition does not require complicated equipment, but it does require slowing down long enough to notice alternatives.
Taking Only the Eye-Level Photograph
Make the obvious frame, then deliberately change your height or angle before leaving.
Zooming Instead of Moving
Zoom changes framing. Moving your physical position changes perspective and the relationship between objects.
Ignoring Reflective Surfaces
Chrome, windows, mirrors and water can reveal another version of the scene that is easy to miss.
Expecting Perfect Symmetry
Reflections do not need to be flawless or centered to add visual interest.
Forgetting the Background
A creative angle can introduce distractions just as easily as it removes them, so check the entire frame.
Photographing Only the Whole Scene
Move closer when a smaller detail tells the stronger story.
Rejecting Distortion Automatically
Curved and imperfect reflections can be part of the visual character of the image.
Stopping After One Good Frame
Once you find one composition you like, try another before moving on. The second or third viewpoint may be stronger.
Quick Perspective Photography Checklist
Perspective and Reflection Photography FAQ
What does perspective mean in photography?
Perspective describes how objects appear in relation to the camera and to one another. Changing your height, distance or angle changes those relationships and can make the same subject look dramatically different.
How can beginners improve photographic perspective?
Start by moving. After taking the obvious eye-level photograph, crouch lower, move closer, step to the side or photograph from a safe higher position. Compare the results and notice how the background and subject relationships change.
What surfaces are good for reflection photography?
Glass, mirrors, polished metal, chrome, windows, still water and puddles can all produce useful reflections. Curved or uneven surfaces can create interesting distortion as well.
Do reflections have to be perfectly symmetrical?
No. Partial and distorted reflections can add just as much interest as symmetrical ones. The reflection should strengthen the photograph, not follow a rigid rule.
What is the difference between zooming and changing perspective?
Zooming changes how much of the scene fills the frame while you remain in the same position. Moving closer, farther away, higher, lower or to the side changes the spatial relationship between the subject and its surroundings.
Can I practice perspective photography with a smartphone?
Yes. Smartphones are especially useful because they are easy to hold low, close to reflective surfaces and at unusual angles. Move the phone physically rather than depending entirely on digital zoom.
How do you make an ordinary subject look more interesting?
Change one thing before giving up on the scene. Lower the camera, move closer, change your angle, simplify the background or look for a reflection that reveals another part of the environment.
Should I correct distorted reflections when editing?
Not automatically. If the distortion comes naturally from the reflective surface and contributes to the photograph, leaving it intact may better preserve what made the image interesting.
Explore More Ways to Change What the Camera Sees
Perspective is one part of creative travel photography.
Try Through Their Eyes: Photographing from a Child’s Perspective for another lesson in changing camera height and viewpoint.
You can also explore Car Wash Photography to see how an ordinary environment can become abstract art through color, movement and unexpected surfaces.
Look Beyond the First Photograph
A stronger photograph may be only one step, one crouch or one reflection away from the obvious one.
You do not need a dramatic destination to practice seeing differently.
Look at the ordinary objects already around you.
Move lower. Get closer. Walk around them. Watch what appears in glass, metal and water. Pay attention to the detail that everyone else passes by.
The subject does not always need to change. Sometimes the photograph changes because you did.
About Angela
Angela Addington is the travel photographer and writer behind Lenses & Latitudes. She shares firsthand destination guidance and practical photography advice for independent and solo travelers, women over 50, road-trippers and weekend explorers. Learn more about Angela.
Pingback: Car Wash Photography: Creative Smartphone Photo Tips
Pingback: Sunset Photography Tips for Beginners and Beyond